If you’ve ever found yourself staring at a surplus of green tomatoes, unsure of what to do with them, you’re in for a treat. I and generations in my family have tried and tested this fermented green tomatoes recipe (my parents have been tomato producers for decades). Are you after a probiotic wonder? That is also crunchy, zesty and fizzy, offering a burst of flavor in every bite. But one that you can make in a flash and enjoy for weeks or months after.
What you’ll love about this recipe
I have early memories of fermented green tomatoes, my grandparents and my parents have always preserved them at the end of the crop from our farm. They always had an abundance, large and small, green and slightly ripe ones. Preserved in giant jars and hidden in the basement, awaiting their glorious reveal when early winter’s cold snapped and no more fresh veggies around. We eat them with homemade pork sausages and “tochitura” (a simple dish made from small chunks of pork slowly fried in its own juices).

Fermented foods are having a moment, and for a good reason! They’re not only delicious but also incredibly beneficial for your gut health and well-being.
My lacto fermented green tomatoes recipe is fabulously quick and so easy. Besides, the best thing about it is that it suits a small family, but, hey, feel free to scale up!
- The Mouthwatering Flavor: Their tanginess is beautifully balanced by a touch of sweetness. I say: eat them straight out of the jar or use them as a zesty addition to sandwiches, burgers or a side dish next to hearty stews.
- Gut-Friendly Goodness: They are packed with beneficial bacteria that promote a healthy gut microbiome. Regular consumption of fermented foods can help improve digestion, boost your immune system, and enhance overall well-being.
- Zero Food Waste: Have an abundance of unripe green tomatoes at the end of the season? I tend to grow the cherry varieties and they are really easy to fit in smaller jars.
- Easy and Budget-Friendly: You don’t need any special equipment, just a jar with a loose fitting lid. Plus, once you’ve got the hang of it, you can adapt this recipe by experimenting with herbs and spices.
- Long-Lasting Deliciousness: They can last for months in your fridge, allowing you to savor the taste of summer well into the winter months.
- Versatility: You can use them in a variety of dishes, from sandwiches and burgers to relishes and salsas. Or swap traditional vinegar pickles on your charcuterie board, a much healthier choice!
Watch how to make Fermented green tomatoes

Ingredients you’ll need
- Green tomatoes – depends on the size, around a pound and a half (600 g – ish). I suggest using smaller whole tomatoes or even cherry tomatoes.
- Carrots (optional) – they will enhance the taste and color, a few handfuls are enough.
- Garlic – as many as you want really 😉, 3-5 large cloves will release garlicky aromas. So tasty !
- Nigella seeds – a teaspoon or two, it’s not perfect science here, just great flavors that will get you making another batch soon enough 😝!
- Chili (optional) – a few slices, seeds removed.
- Water and salt (the secret to natural lacto-fermentation) – the simplest brine ever that helps the good bacteria grow and ferment your veggies. And the salt keeps the bad bacteria from growing, protects the vitamins in the veg and keeps your tomatoes firm!

How to ferment green tomatoes
Time needed: 7 days and 15 minutes
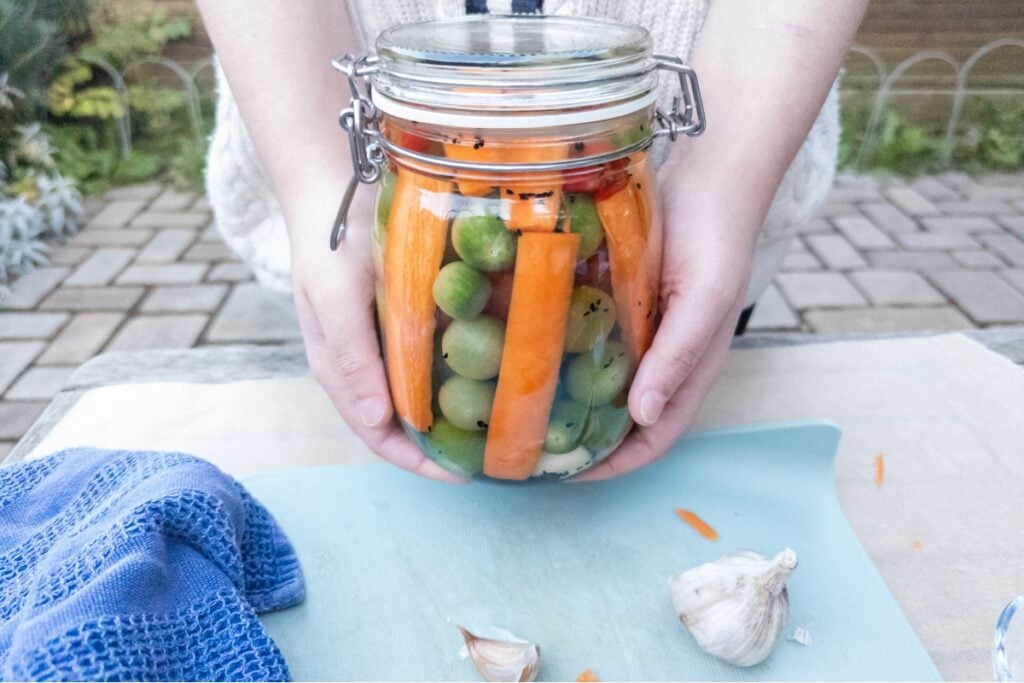
Lacto-fermented green tomatoes- an eco-friendly way to enjoy the flavors of summer all year round!
- Clean the green tomatoes and carrots
Remove any unhealthy or bruised tomatoes. Give them a good wash in cold water.
Wash, cut the top and root end off the carrots and peel them.
Pat dry with kitchen paper or a clean napkin. - Chop the carrots
Slice the carrots in batons of 0.5 cm slices and 10 cm length approximately.
You can slice them in 0.5 cm discs if you want, but the batons are easier to slide in the jar sides. - Prepare the garlic, chili and seeds
Peel the garlic and set aside.
Remove the seeds from your chili, slice as many or as few as you want. I only added a few large slices of a cayenne chili pepper 🌶️🌶️🌶️.
The nigella seeds should be sprinkled liberally, I would estimate a few teaspoons. - Prepare the brine
Make a brine by adding 25 g salt in 1 liter of water. Depends on how many jars you are filling, you might need to make more brine.
- Burp the fermented green tomatoes 🫧
After 1-2 days (depending on how warm your kitchen is, you may notice the brine in the jar getting slightly cloudy.
Every day for the next week, use a clean straw to gently blow into the jar to aerate the brine. This helps release gases formed by the friendly bacteria and prevents the vegetables from getting mushy.
With a clean spoon taste the brine daily from day 3 onward to see how sour you like it. - Pour the brine and let the fermentation begin!
Add the brine over the vegetables until everything is fully covered.
Cover loosely with a lid and set on the counter at room temperature, but not too close to any heat sources.
- The fermented green tomatoes are ready for the fridge
After a week, your fermented green tomatoes are ready! Give them a taste to make sure you like it, but if you want it more sour you can extend the fermentation for an extra day.
The taste should be slightly sour, acidic, a little fizzy and very tasty 😋. They will keep in the fridge for at least 12 weeks. Don’t worry about the slight sediment settled at the bottom of the jar or a thin white layer (this is just harmless yeast) on top, it’s normal.

Pro Tips
- Make sure all the utensils and recipients you use are clean.
- Remove the seal from the lid, so that gas can escape during fermentation.
- When you “burp” the fermented green tomatoes, make sure you push the tomatoes and carrots down gently, so the liquid is covering them fully.
- If you like horseradish, I encourage you to try a batch adding a few batons, it adds a whole level of flavor 😋.
Preparation time
It takes around 10 minutes to prepare the vegetables.
Then another 5 minutes to prepare the brine. I am being generous here, because I know myself (not always super organized 😉).
Fermenting time
The fermentation takes around a week, but they will still continue to ferment very slowly in the fridge, so you notice the brine gets tastier by the week. The tomatoes take a little longer, especially the ones that are showing no signs of ripening at all, as the skins are thicker.
Total time
This means that in one week you can have a healthy nourishing pickle to add to any meals, you can even replace sides with it (literally, it is so versatile!😉). But, if your kitchen is cool they can take up to two weeks.
Servings
This recipe uses around a pound and a half (600 g) of green tomatoes. This should be enough for at least 10 servings, especially if you use them as a condiment.
Nutritional goodness
The garlic, chili, carrots and nigella seeds count towards the 30 plants a week which are wonderful news for your gut health! Not to mention all the good lactic acid bacteria (LAB)!
What to serve with fermented green tomatoes
- This condiment will go great with grilled meats, especially pork or beef and sausages.
- Add chunks of fermented green tomatoes in a flatbread or taco to replace jalapenos or chilies. They have a slight kick that is so unique!
- But also with hearty stews or curries, and even alongside fries or wedges.
- Sometimes if I’m in a hurry, I would just replace the vegetables from my sausages and char-grilled veggies recipe or my lamb koftas recipe and end up with a gorgeous meal.
- Chop the pickled garlic really finely and mix in your favorite dressing.
- I use the liquid as a vinegar replacement to make an amazing vinaigrette or to add to chunky soups for sour aromatic deliciousness!

Inviting my homemade fermented green tomatoes into your diet is not just about flavor; it’s a step ahead to embrace gut health and the beauty of nutrition-rich, colorful ingredients.
- If you are just getting started with fermented vegetables, this recipe is so rewarding and easy!
- Check out my other fermented veggies recipes for even more probiotic goodness.
- If you make my recipe, take a snapshot for your Instagram
- Post and tag me @candyflosie😉🤗!
- Don’t forget to rate my recipe! It will make my day!
fermented green tomatoes FAQ
After hey have been preserved through the lacto-fermentation process, they are tangy, slightly sour, and have a unique flavor compared to fresh tomatoes.
Green tomatoes are traditionally used for fermentation due to their firmer texture. I love using nearly ripe tomatoes. If you want, you can experiment with using ripe tomatoes. The result will be softer and have a different flavor profile.
The fermentation process typically takes around 1 to 2 weeks, depending on the temperature and desired level of fermentation. Taste the tomatoes every day to find when they have reached your preferred level of tanginess.
When prepared and stored properly, fermented green tomatoes are safe to eat. Take it from a food scientist 🤩!
The natural fermentation process creates an acidic environment that inhibits harmful bacterial growth. The brine itself will be so tasty and garlicky. In fact, I challenge you to have a sip, if you ever had a ginger shot that’s what it feels like. Punchy and it can boost your metabolism!
If mold appears, remove it immediately! Scrape off the moldy surface, make sure the tomatoes are fully submerged, and replace the lid. Mold growth can happen if the tomatoes are not properly submerged or if the container isn’t clean.
Yes, you can reuse the brine for more batches to kickstart the fermentation process. Give the brine a little taste to make sure is still salty and has not become too diluted. You can always top it up with fresh brine 😉!
Once fermented to your taste, transfer the green tomatoes to a sealed container and pop them in your fridge. This will slow down the fermentation process and help preserve their flavor and texture. If you have a cool basement or shed, they will keep well over the winter, but for a small batch, fridge is handy.

Fermented green tomatoes
Equipment
- 1 jar approximately 750 ml to 1 l capacity with screw or rubber seal lid
- 1 sharp knife
- 1 funnel optional
- 1 scale
- 1 measuring jug (optional, reuse a clean water bottle with known capacity, for example 1 liter)
Ingredients
- 600 g green or unripe tomatoes
- 2 medium carrots optional, sliced in batons (peeled and no blemishes)
- 25 g salt
- 1 liter water
- 4 large garlic cloves
- 2 tsp nigella seeds
- 3 small chili chunks (optional, add more or less depends on how spicy you like it)
Instructions
Prepare the vegetables
- Remove the stalks from the tomatoes and give them a good wash in cold water.
- Wash the carrots under cold running water if using them. Remove the tops and root ends and peel them.
- Slice the carrots in 0.5 cm batons and approximately 10 cm in length.
Prepare the garlic and chili
- Peel the garlic and set aside. Make sure your garlic is nice and plump and has no blemishes. You can cut the dark end if you want but it is not necessary.
- I sliced the garlic in thick slices for this recipe, but you can totally use whole peeled garlic cloves.
- I used a frozen cayenne chili pepper that I bought at farmers market and put in the freezer. But if you are using fresh, make sure it is clean, give it a rinse under cold running water.
- Chop as much chili as you would like, I used a few small chunks as this cayenne is very hot 🌶️🌶️🌶️🌶️.
Stuff the fermentation jar
- Start by laying a few garlic cloves, chili and a generous sprinkle of nigella seeds.
- Continue to stuff the jar with the green tomatoes.
- Stand the carrot batons on the sides of the jar and vertically through the tomatoes.
- Add the remaining garlic and nigella seeds as you fill the jar.
- Wedge a few slices of carrots at the top so as to keep everything from rising up.
Prepare the brine
- Add 25 g of salt to one liter of cold water and swirl to dissolve.
- Pour the brine carefully over the veggies until they are fully covered.
Fermentation stage
- Make sure there is no space left in the jar at the top then close the lid loosely. Important: remove the rubber seal to allow gas to escape during fermentation!
- Set the jar aside at room temperature, but not too close to a hot spot.
- The liquid will become a little cloudy from day 2 onwards.
Burping your fermented green tomatoes (yes you heard it right LOL)
- You need to "burp" the brine daily. Use a large diameter stainless steel straw if you have one, but can use any disposable drink straws.
- Blow gently to form bubbles in the brine careful not to spill the brine over.
- This will help with the lacto – fermentation. Taste the brine after day 3 and the green tomatoes after day 5, to make sure you are happy with the taste.
- It will take between 7 days and 14 days to achieve a pleasant sourness and a slight fizz, depending on the temperature of the kitchen.
How to store your fermented green tomatoes
- After 7 days (or even up to 14 days), if you are happy with the level of sourness, store the jar in the fridge.
- Every time you serve it, take some veggies out of the brine with clean utensils and place the jar back in the fridge immediately.
Video
Notes
You may wonder what type of salt to use, but I found that it really doesn’t matter if you are using Kosher salt or pink Himalayan salt. I just use ordinary table salt and it works like a treat! 🫶